Is your Shark robot dying after only 10 minutes? It’s likely time for a new battery. Learn how to safely swap the pack and which model to buy.
Lithium-ion batteries have a limited lifespan. After 2 to 3 years of daily cleaning sessions, your Shark robot’s battery will lose its ability to hold a charge. If your robot used to clean for over an hour but now returns to the dock after just 15 minutes, a battery swap is required.
Is your Shark robot dying after only 10 minutes? It’s likely time for a new battery. Learn how to safely swap the pack and which model to buy.
- Symptoms: Robot dies shortly after leaving the dock, Battery indicator flashes red immediately, Robot cannot finish mapping runs due to low power
- Tools: Phillips Head Screwdriver, Replacement Battery Pack
- Difficulty: Medium
Replacing the battery is a 5-minute DIY task that is significantly cheaper than replacing the entire robot.
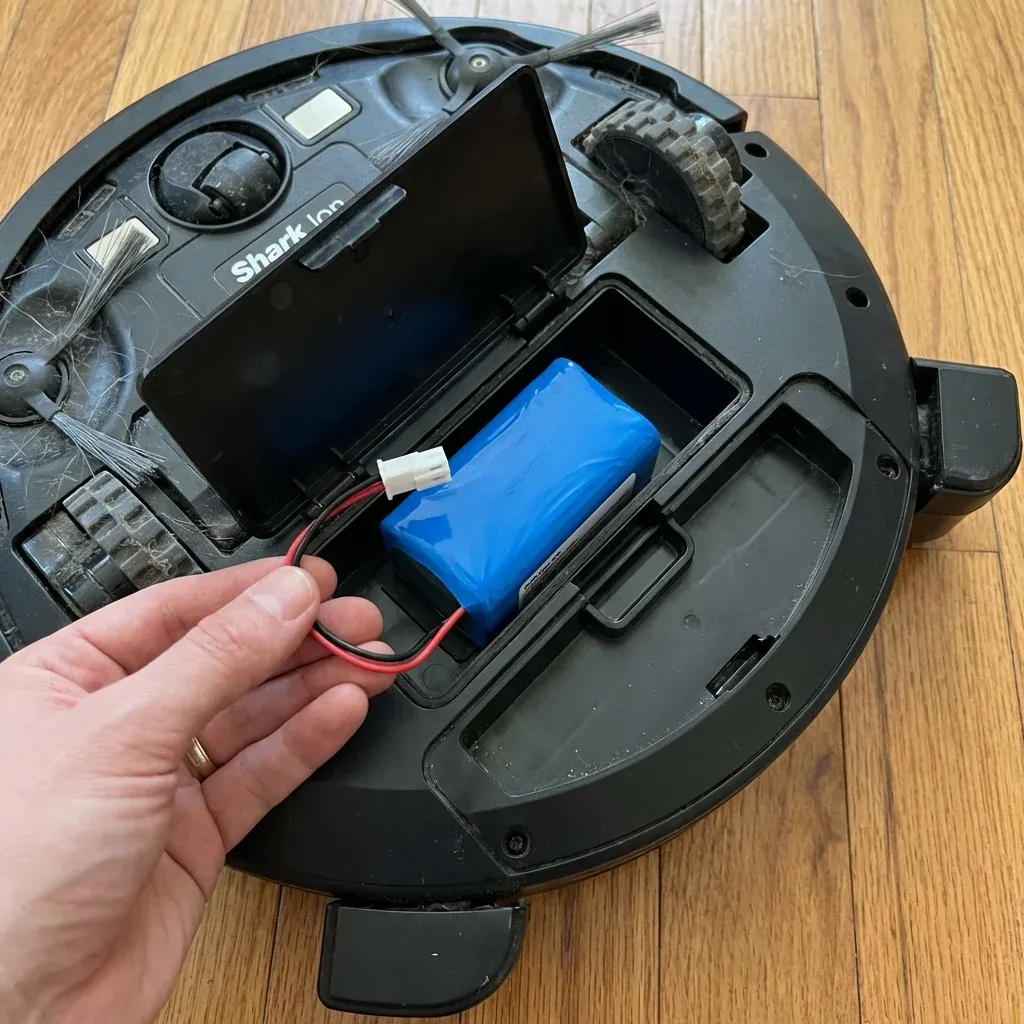
1. Identify Your Battery Type
Shark uses two primary battery connections. You must check your model number (found on the sticker on the bottom of the robot) before ordering.
- RVBAT850 (3-Prong): Fits most Ion, IQ, and AI models (R75, R85, RV750, RV850, RV1001AE).
- RVBAT700 (2-Prong): Fits older RV700 and RV720 models.
TIP: Check the voltage. Most Shark batteries are 14.4V or 14.8V. If the replacement battery has a different voltage, do not install it, as it could damage the robot’s main circuit board.
2. Removing the Old Battery
- Flip the power switch to the OFF (O) position.
- Turn the robot over and place it on a soft towel to avoid scratching the camera or sensors.
- Unscrew the two Phillips-head screws on the battery compartment door.
- Lift the battery out using the two white fabric pull-tabs.
- Squeeze the plastic clip on the wire connector and pull gently. Do not pull on the wires themselves.
3. Installing the New Pack
- Plug the new battery connector into the robot’s socket until it clicks.
- Tuck the wires into the side of the compartment to ensure the door can close flat.
- Re-install the screws.
4. The Calibration Charge
Once the new battery is installed, it needs a “deep charge” to calibrate the internal sensors.
- Place the robot on the dock manually.
- Let it charge for a minimum of 12 hours even if the light turns blue earlier.
- For the first clean, allow the robot to run until it is completely “dead” or forced back to the dock. This helps the app accurately display battery percentages.
Battery FAQ
| Question | Answer |
|---|---|
| How long should it last? | 2-3 years with daily use |
| Can I use generic? | Yes, if the voltage and mAh match |
| Is it recyclable? | Yes, do not throw Li-ion in the trash |
| Does it fix mapping? | Yes, if runs were failing due to power |
TIP: To extend the life of your new battery, try to keep the robot’s charging contacts clean. Use a bit of rubbing alcohol to wipe the metal plates on the bottom of the robot and the pins on the dock once a month to ensure a clean, high-efficiency charge.